#Overview
These units were installed on Outside units that were installed in 2005 after the Indoor units were found to be successful at a few test locations in 2004 under kiosks that were formally DVDPlay kiosks.
#Air Conditioner
These machines were installed and used the a modified version of the IceQube IQ2200VS Air Conditioners. All manuals/parts are available on the IceQube website and replacement parts have to be ordered over the phone. Expect the parts to be a bit pricey. Cheapest parts would to find used parts in another unit, but the guarantee of said parts to last is close to none.
#IQ2200VS Recall Notices
All units manufactured before 2012 had a recall with the Blower Motors, which could become a fire hazard. If your unit was manufactured before 2012 and the Blower Motors parts BLWR1011-A and BLWR1007-A that are older than 2012, you will need to order replacement parts from IceQube before powering these units.
#IQ2200VS Programming
To enter programming mode on the IceQube IQ2200VS, use the password 1234 (note: some blue units may use 1234321). If the password is accepted, the lights will indicate the current settings. Use buttons 1 and 2 to adjust values, and button 3 to move to the next section. When finished, press button 4 to exit programming mode. All changes made will apply to that specific controller.
If you tried both passwords and you are unable to get into programming mode, you will need to contact IceQube or swap the controller out from another Kiosk's Unit or order the part.
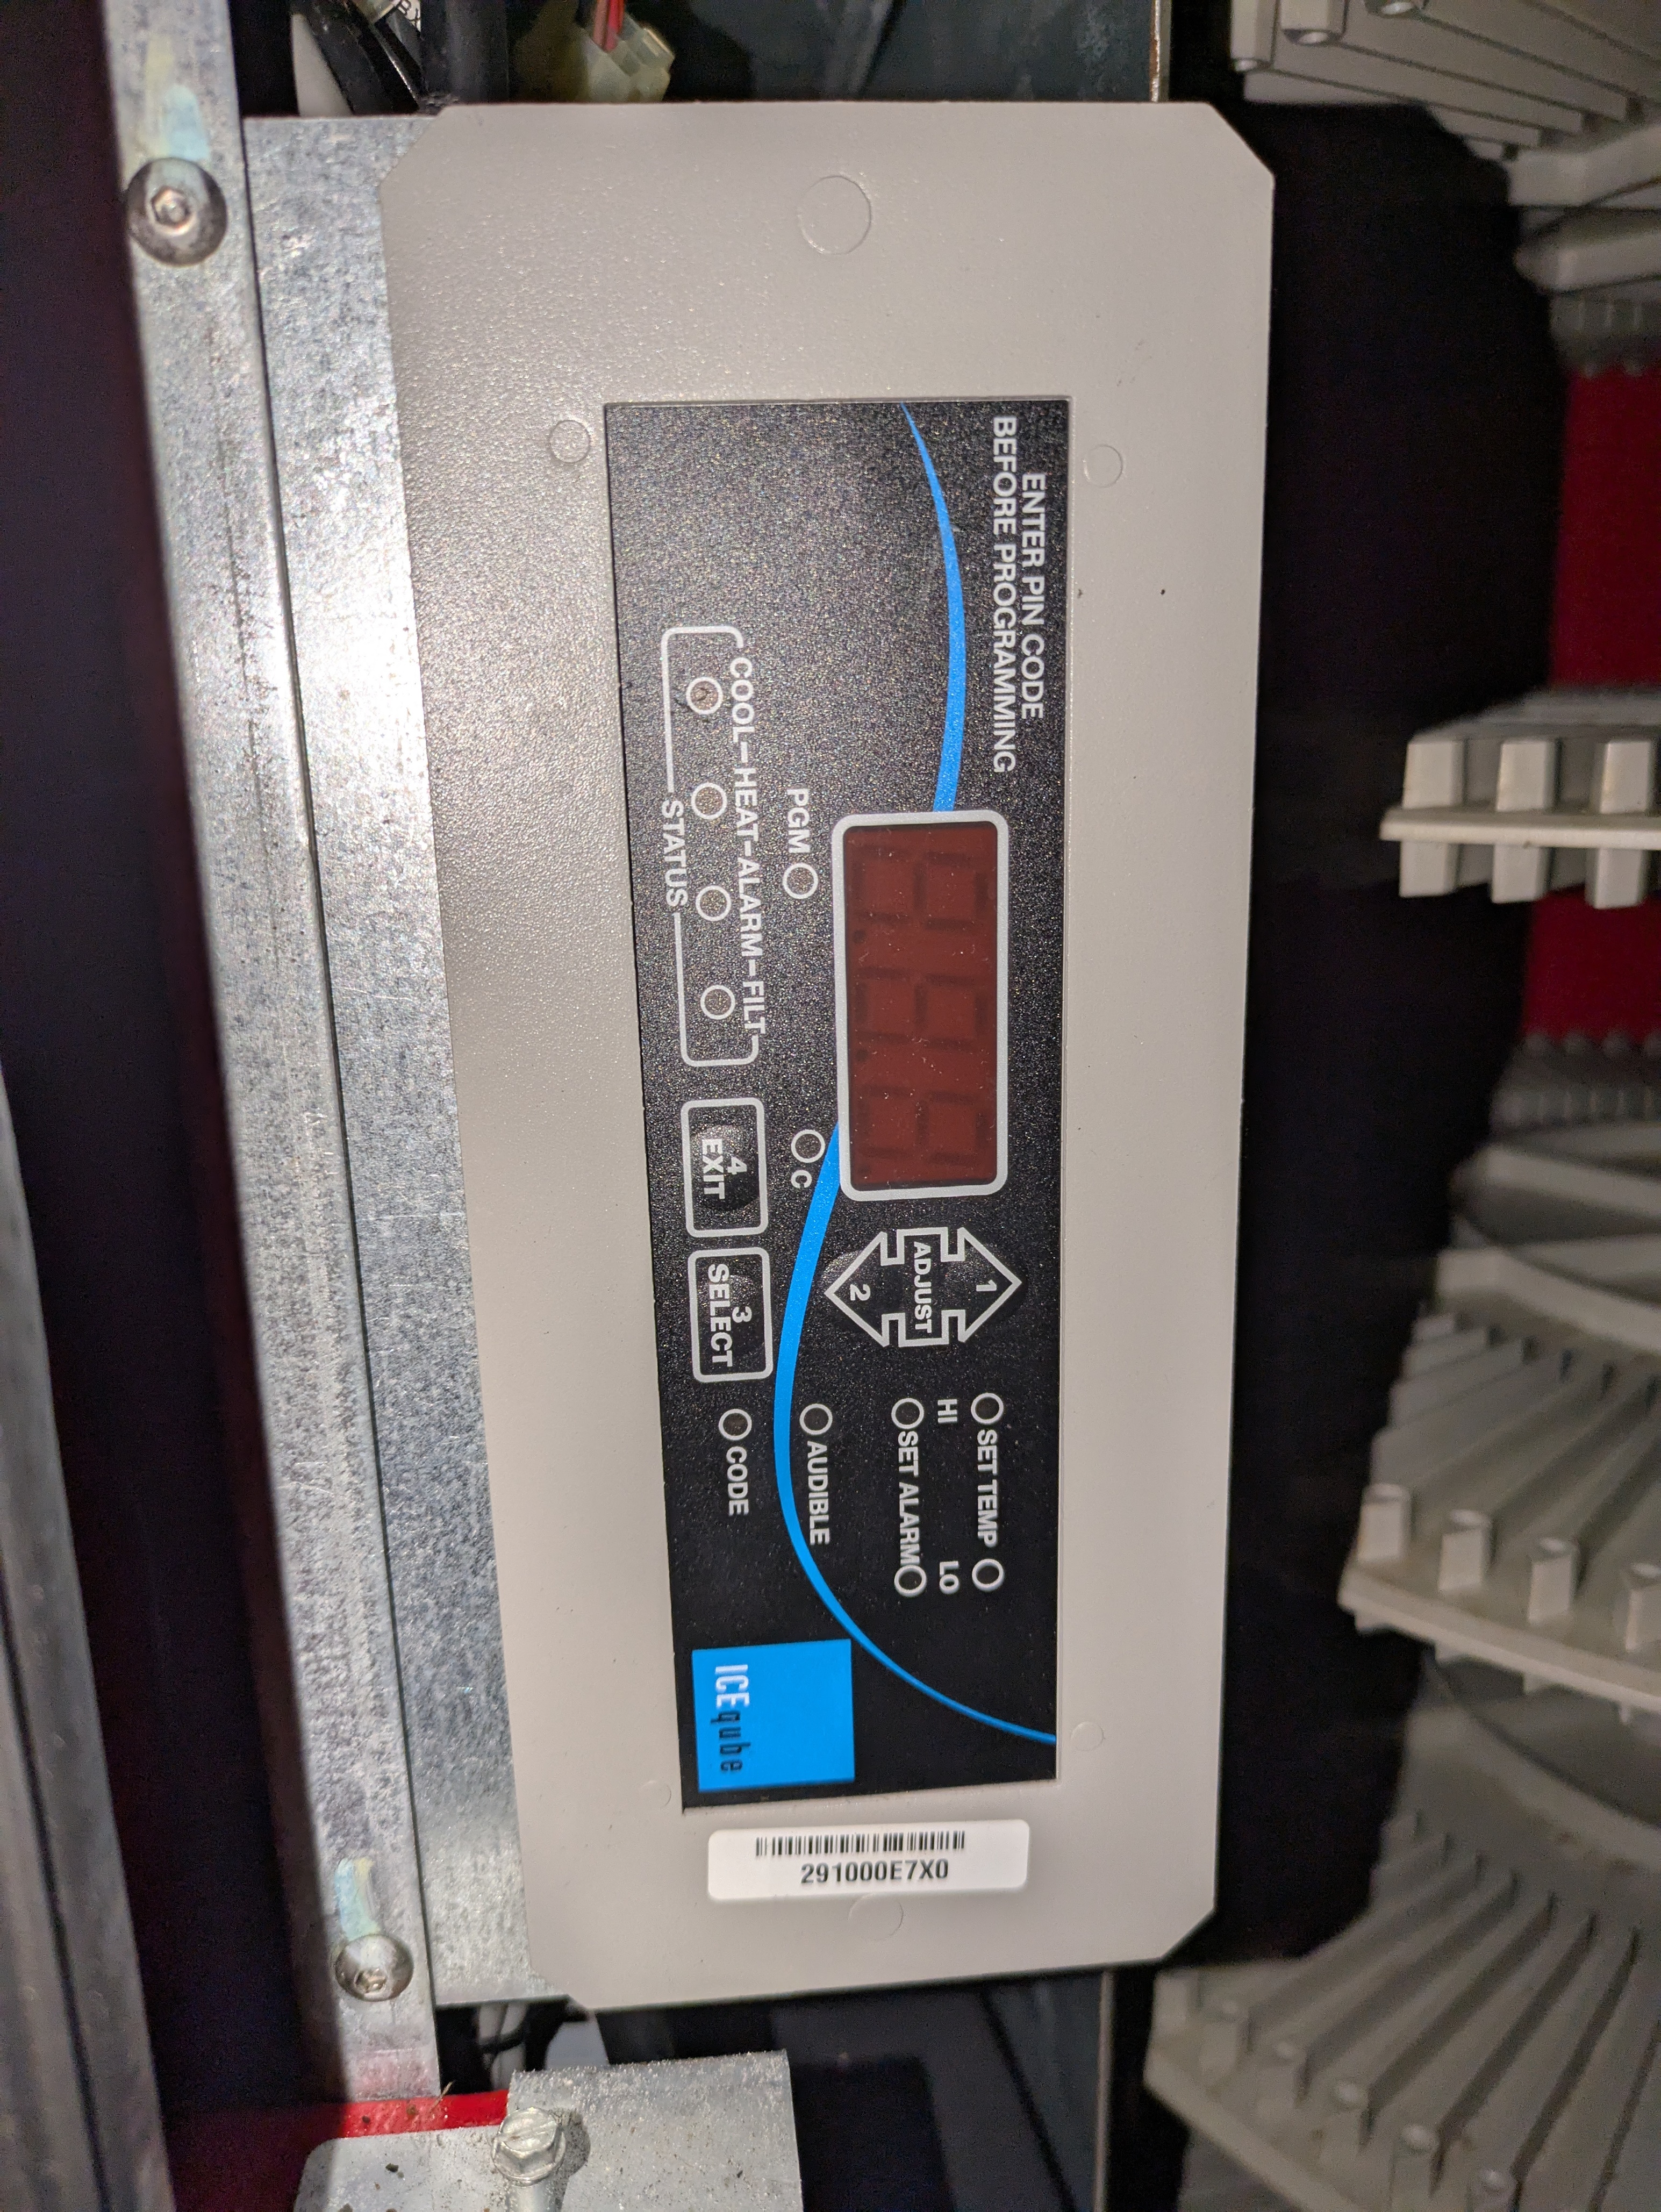
#IQ2200VS Troubleshooting
Always unplug the unit before troubleshooting or performing any maintenance to prevent electric shock. Even when unplugged, discharge any capacitors before touching internal components. Never attempt to bypass or modify the plug or internal wiring while the unit is connected to power.
#3.10, 3.12, 3.14
Indicates a shorted sensor.
Solution:
Inspect the sensor cable for damage. If damaged, a replacement is required to clear this code.
#3.15, 3.16
Indicates supply voltage is either too high or too low.
Solution:
Check power supply for high or low voltage condition. May indicate damage caused by power spike. If this is the case, a replacement of the unit is needed.
#EC
Indicates a shorted condenser sensor.
Solution:
Inspect the sensor cable for damage. If damaged, a replacement is required to clear this code.
#EO
Indicates an open condenser sensor.
Solution:
Inspect the sensor cable for damage and check that it is plugged into the rear of the controller. If plugged and still occurs, you will need to replace the condenser.
#212
Indicates a shorted evaporator sensor.
Solution:
Inspect the sensor cable for damage. If damaged, a replacement is required to clear this code.
#CC
Indicates a shorted condenser sensor.
Solution:
Inspect the sensor cable for damage. If damaged, a replacement is required to clear this code.
#C-O
Indicates an open condenser sensor.
Solution:
Inspect the sensor cable for damage and check that it is plugged into the rear of the controller. If damaged, a replacement is required to clear this code.
#C-C
Indicates a shorted condenser sensor.
Solution:
Inspect the sensor cable for damage. If damaged, a replacement is required to clear this code.
#Blank Display
Indicates loss of power to the controller or a defective controller.
Solution:
Check the output voltage at the transformer secondary. The voltage should be a nominal 24 VAC. If the proper voltage is available at the transformer and the controller harness is secure to the controller, the controller is most likely faulty and will need replacement.
#Flashing Cool LED
Indicates that the cooling has not been initiated. Within 3.5 minutes, the Cool LED should be lit continuously, and cooling should begin. When the Cool LED is lit continuously, the compressor and condenser blower should be operating.
#PDCM IQPDCM-15
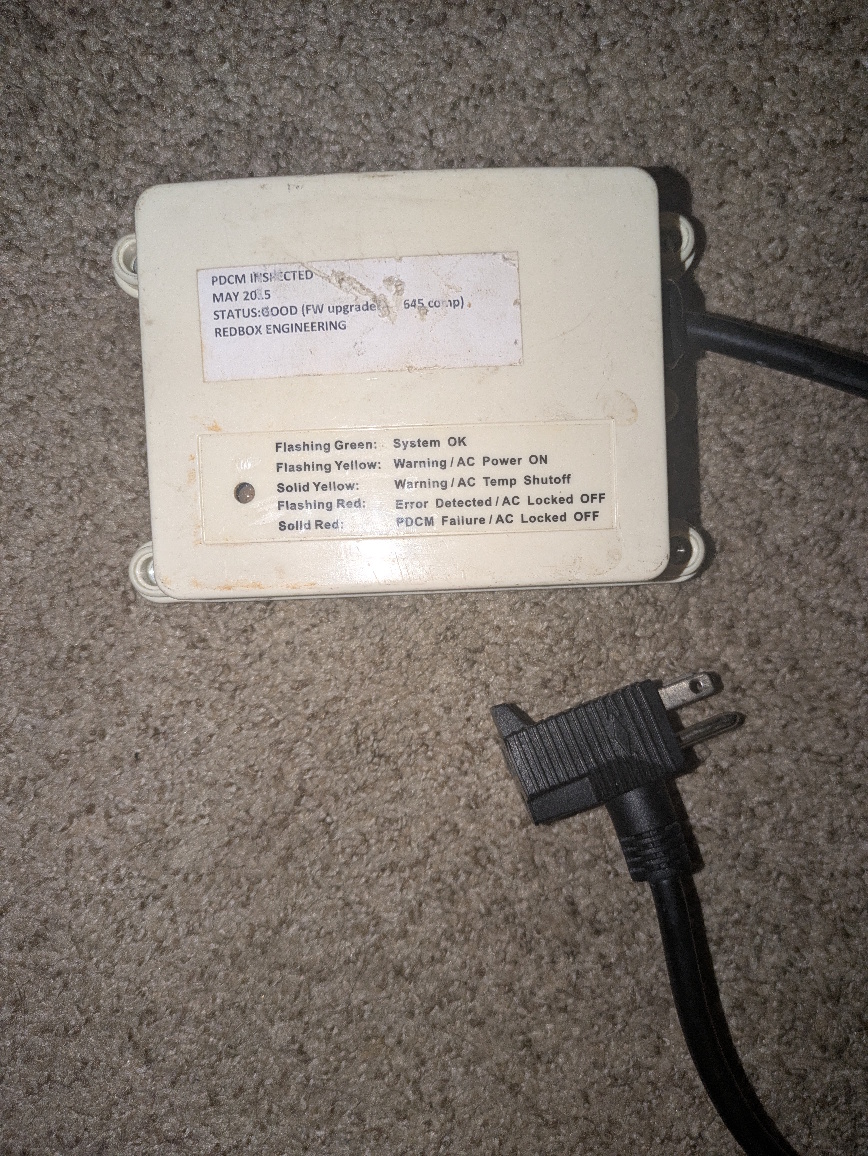
These were installed in all kiosks, even if the AC units weren't recalled. These served when to prevent the Air Conditioners from catching on fire, but upon notice from Former Employees (FSRs and Techs), these have been known to run poorly or outright fail leaving a burn mark on the box or the box catching fire in rare cases. Most recommend unplugging this from the AC unit and toss it out.
#IQ2200VS Additional Information
You can find more info and manuals on IceQube's official website under VS Series Air Conditioners.
#Air Exchanger
These machines were installed and used the IceQube IQ900FFS Air Exchangers. There are no manuals/known replacement parts for these kiosks as they are proprietary to Redbox and was manufactured under IceQube. These units rolled out in kiosks made in 2012 and newer at a few locations in some markets, but did not fully replace the Air Conditioners. These units do not contain a compressor, it only exhausts heat and is not a viable replacement for the AC units in hot environments.
#IQ900FFS Programming
You can turn these units on and off through Field Maintenance or HAL Tester. If its not configured, you will need to configure this in HAL Tester in order for the Air Exchanger button to appear in Field Maintenance.
#IQ900FFS Temperature Adjustment
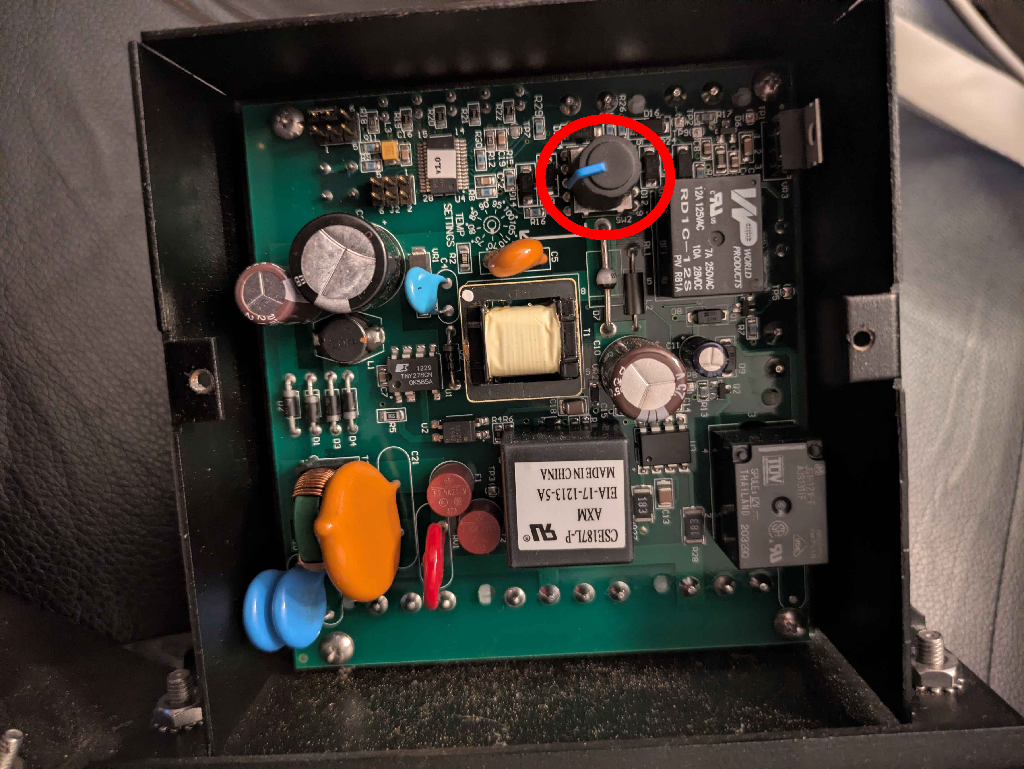
It is best to go in from the back to adjust the temperature.
To adjust the temperature when the exhaust fan will turn on, you will need to open the panel from behind the controller (right side) and remove two screws to get access to the knob to adjust the temperature. The knob was likely hidden to prevent FSRs from tampering with the settings (without needing to tape it like the Stego CR027 Heater unit)
#IQ900FFS Troubleshooting
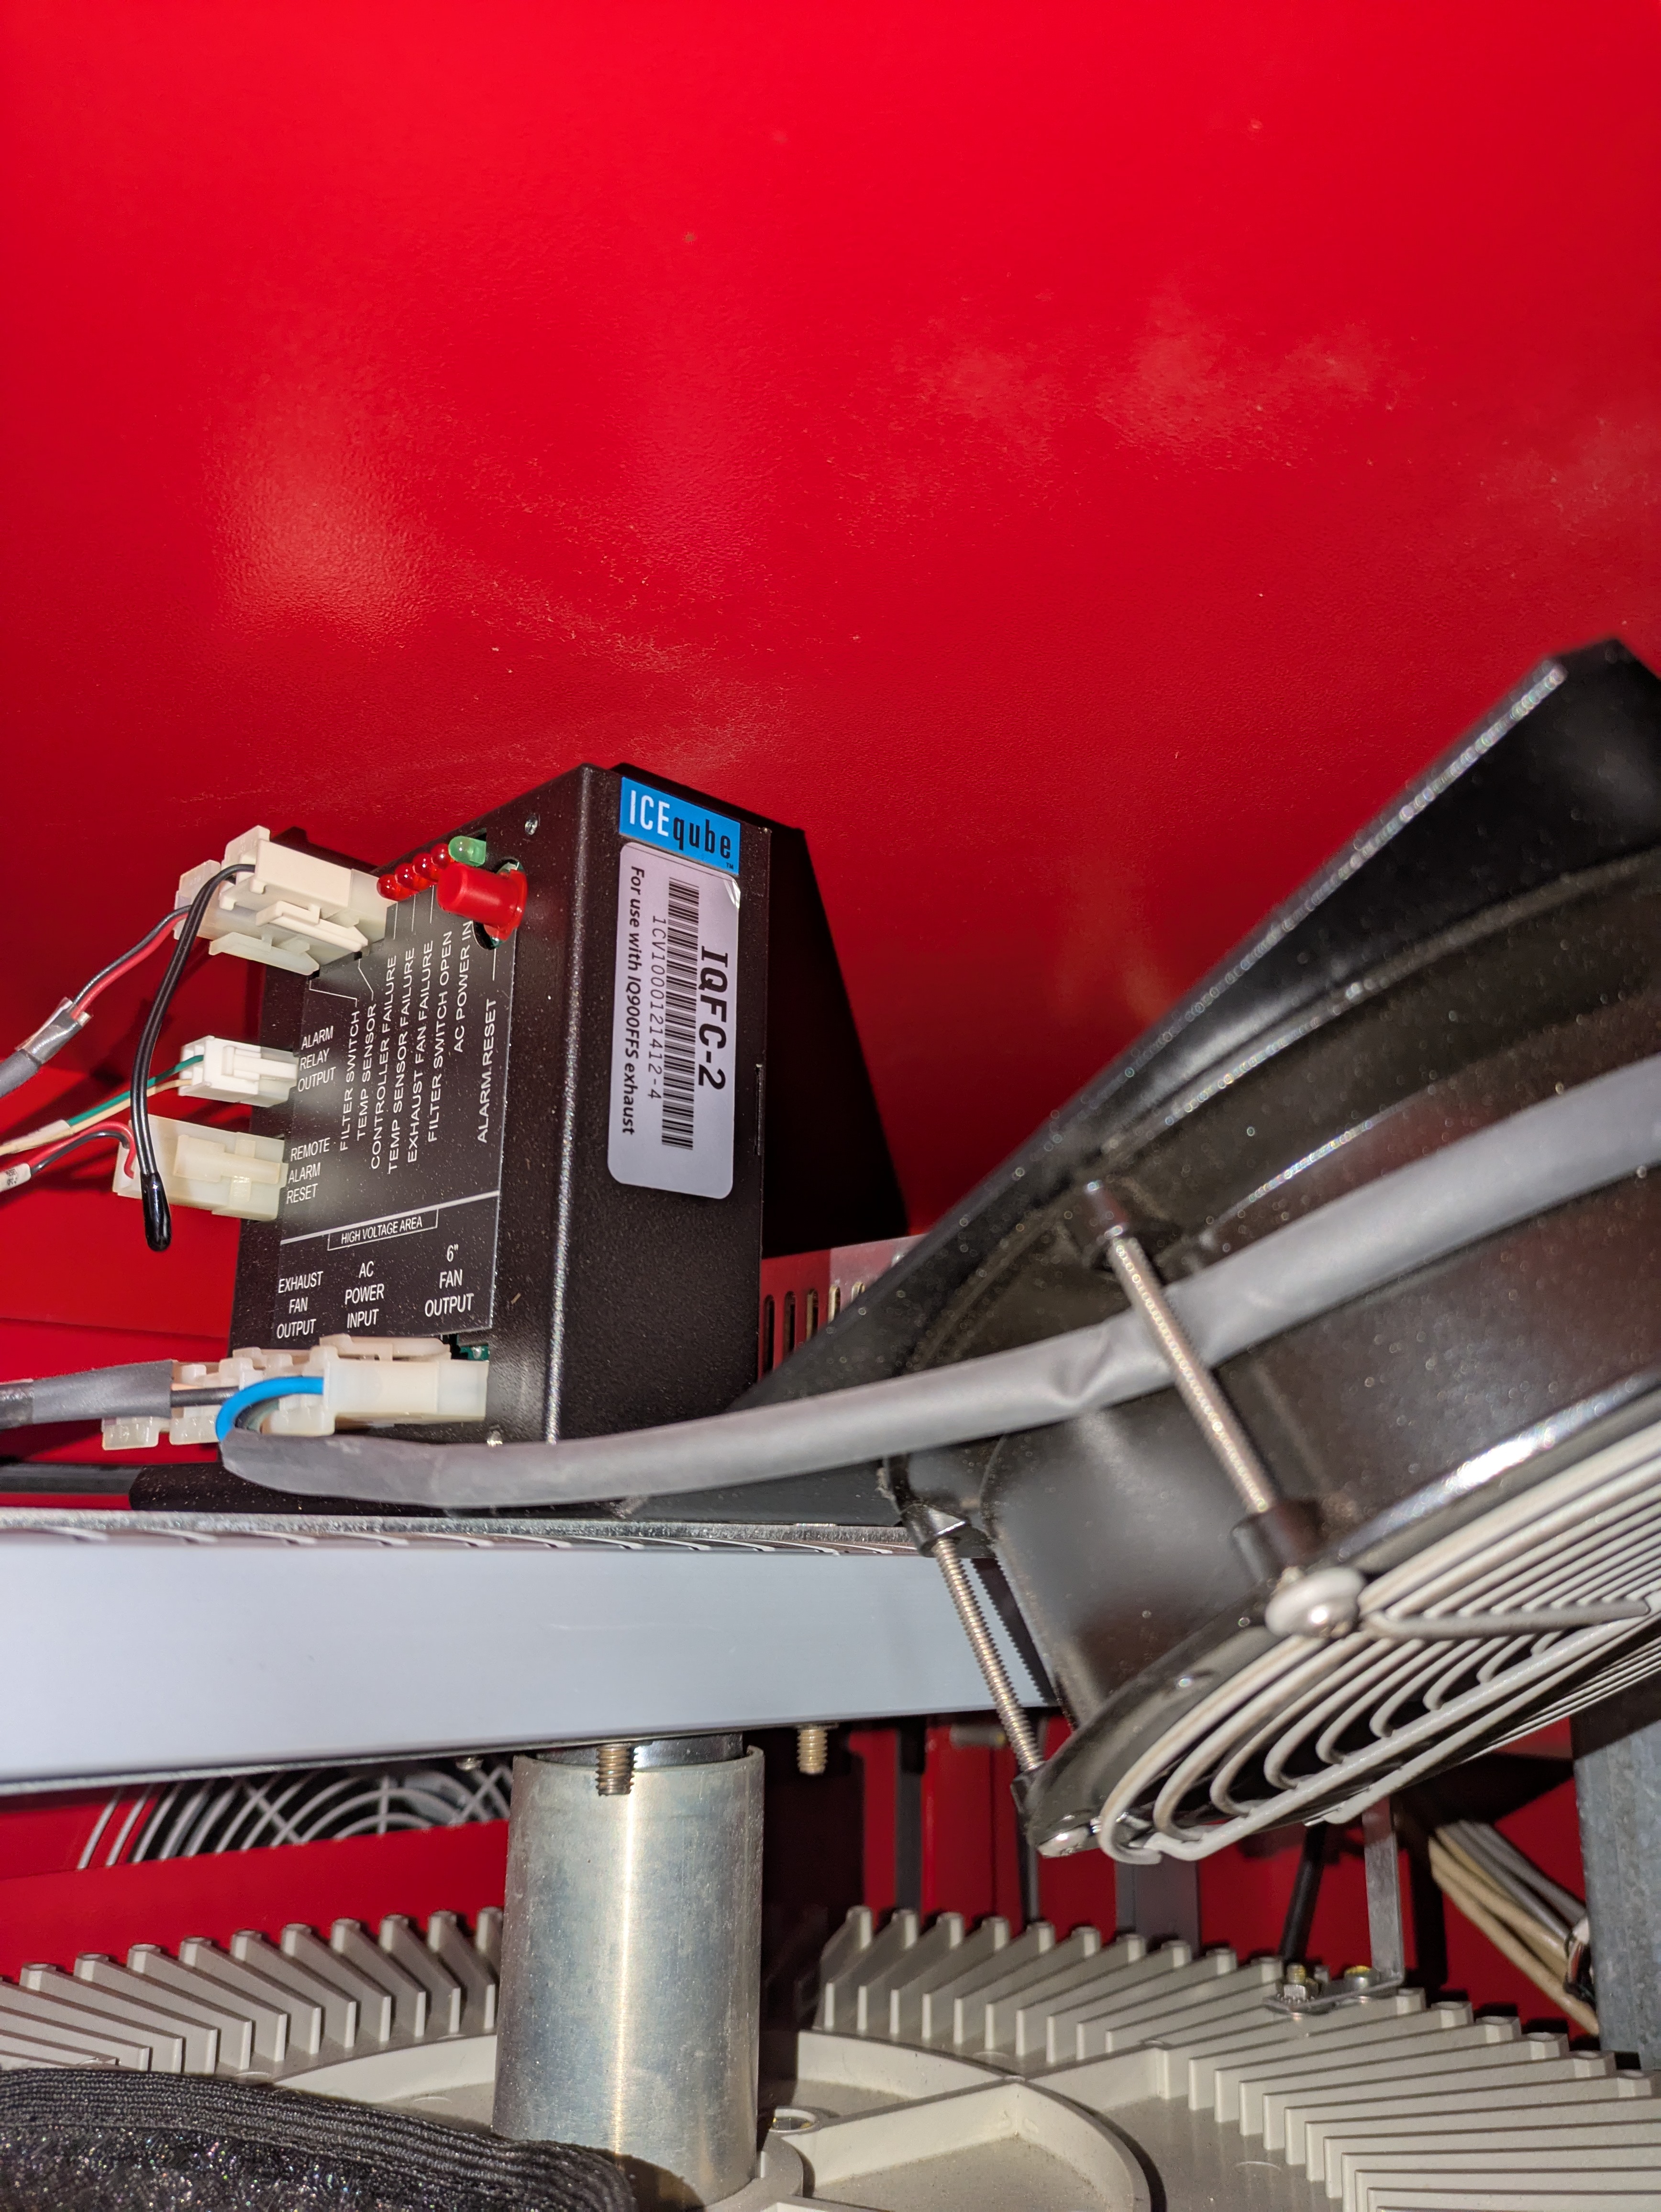
Errors will be displayed on the IQFC-2 Controller when the red lights are displayed.
#Controller Failure
Indicates an issue with the IQFC-2 Controller
Solution:
1. Controller will need repairs. Removal from the unit is required to diagnose and repair said controller. If the controller is damaged beyond repair, a replacement is required.
2. You will need to configure the Air Exchanger in HAL Tester (credits to TheDeadCactus) and the light should turn off if swapping to a kiosk that previously had an AC Unit installed.
#Temp Sensor Failure
Indicates the Temp Sensor has failed
Solution:
Temperature Sensor will need replacement. (At this time, there is no replacement parts for this. You will need to make your own sensor and is possible to get this working again.)
#Exhaust Fan Failure
Indicates the rear fan motor has failed or open circuit.
Solution:
Replacement rear fan motor needed to get these back in order or inspect the wiring from the EXHAUST FAN OUTPUT to the rear fan. Repair wiring if necessary.
#Filter Switch Open
Indicates the rear filter has been removed or the switch wiring has failed
Solution:
Make sure the filter is installed.
If the filter is installed, inspect the wiring from the switch to the Filter Switch connector on the IQFC-2.
- Repair any exposed wires.
- If sensor is damaged, replacement is needed
#No Power
Means the power supply has failed, which means the AC POWER IN light will not turn on.
Solution:
Replacement of the IQFC-2 is required.
#HAL Tester and Field Maintenance can't communicate with the Air Exchanger
Check the ALARM RELAY OUTPUT and REMOTE ALARM RESET wiring.
- ALARM RELAY OUTPUT goes from
IQFC-2toJ3on theDVD-25-000-05PCB Board - REMOTE ALARM RESET goes from
IQFC-2toJ8on theDVD-25-000-05PCB Board
Solution:
- If wiring is damaged, repairs required
- Make sure the Air Exchanger is configured. You will need to go to
HAL Tester > Configure Devicesto configure the Air Exchanger. By default, it is not configured, but previously configured devices will be stored in HAL Services.
#IQ900FFS Additional Information
There are no manuals or parts list as its proprietary to Redbox and due to contract obligations, they are unable to release that info. Obtaining OEM parts may be hard to find or require making your own parts or finding alternative parts to serve as replacements. Parts will be documented as these machines start to experience problems over time.
Note that the filters will need to be remained clean or else the dust can start flowing around the kiosk and can damage kiosk equipment and discs. If the filter gets dusty, with the stock filter, you will need to spray it out with a hose (do not power wash as they will become damaged). If you need to replace these, you can purchase standard Aluminum Mesh Filters (which can be washed and reused)